
Image
From site work to custom brick and stone masonry, Gardeny can install your project with its own talented artisans and quality landscaping equipment. Using our extensive knowledge of soils, plants, landscape materials, and construction techniques, we are well qualified for any size project. We employ all our resources to achieve the best possible results, no matter the scale.
Our distinctive water features will introduce sound and motion into your landscape experience.The element of water will release your stress and introduce you to the essence of nature herself. No two water gardens are alike, yet most are similar. Constructed of quality components and natural materials, our water features compliment any setting.
Gardeny plants and trees are grown at our own NC Certified Nursery in Durham. Our NC Certified Plant Professional and staff horticulturist have collaborated to create one of the best nursery resources in the Triangle. We offer Landscape Investment Plants and Trees that will return dividends in growth, beauty, and value throughout the life of your landscape.


Gardeny plants and trees are grown at our own NC Certified Nursery in Durham. Our NC Certified Plant Professional and staff horticulturist have collaborated to create one of the best nursery resources in the Triangle. We offer Landscape Investment Plants and Trees that will return dividends in growth, beauty, and value throughout the life of your landscape.
Nulla libero massa, rhoncus in sem semper, suscipit gravida ante. Mauris erat massa, imperdiet quis turpis nec, faucibus aliquam metus. Donec ut egestas orci.
Ut augue enim, tempus sit amet quam vel, cursus elementum nulla. Vestibulum ante ipsum primis in faucibus orci luctus et ultrices posuere cubilia Curae. Etiam ac metus ac enim egestas euismod quis sed dolor. Aliquam eget tellus enim. Praeggsent eu tristique leo, ut ornare purus. Pellentesque augue libero, dignissim vel odio sed, fringilla pretium nisl.
Phasellus iaculis tellus id odio suscipit, at cursus leo mattis. Praesent elementum scelerisque lacus, eu porta ex eleifend aliquet. Mauris odio erat, efficitur non dolor at, tincidunt vestibulum lectus.
Inara Wolf, Ramos inc.
Ut augue enim, tempus sit amet quam vel, cursus elementum nulla. Vestibulum ante ipsum primis in faucibus orci luctus et ultrices posuere cubilia Curae. Etiam ac metus ac enim egestas euismod quis sed dolor. Aliquam eget tellus enim. Praesent eu tristique leo, ut ornare purus. Pellentesque augue libero, dignissim vel odio sed, fringilla pretium nisl. Nulla libero massa, rhoncus in sem semper, suscipit gravida ante. Mauris erat massa, imperdiet quis turpis nec, faucibus aliquam metus. Donec ut egestas orci.
Video
From site work to custom brick and stone masonry, Gardeny can install your project with its own talented artisans and quality landscaping equipment. Using our extensive knowledge of soils, plants, landscape materials, and construction techniques, we are well qualified for any size project. We employ all our resources to achieve the best possible results, no matter the scale.
Our distinctive water features will introduce sound and motion into your landscape experience.The element of water will release your stress and introduce you to the essence of nature herself. No two water gardens are alike, yet most are similar. Constructed of quality components and natural materials, our water features compliment any setting.
Gardeny plants and trees are grown at our own NC Certified Nursery in Durham. Our NC Certified Plant Professional and staff horticulturist have collaborated to create one of the best nursery resources in the Triangle. We offer Landscape Investment Plants and Trees that will return dividends in growth, beauty, and value throughout the life of your landscape.
Gardeny plants and trees are grown at our own NC Certified Nursery in Durham. Our NC Certified Plant Professional and staff horticulturist have collaborated to create one of the best nursery resources in the Triangle. We offer Landscape Investment Plants and Trees that will return dividends in growth, beauty, and value throughout the life of your landscape.
Nulla libero massa, rhoncus in sem semper, suscipit gravida ante. Mauris erat massa, imperdiet quis turpis nec, faucibus aliquam metus. Donec ut egestas orci.
Ut augue enim, tempus sit amet quam vel, cursus elementum nulla. Vestibulum ante ipsum primis in faucibus orci luctus et ultrices posuere cubilia Curae. Etiam ac metus ac enim egestas euismod quis sed dolor. Aliquam eget tellus enim. Praeggsent eu tristique leo, ut ornare purus. Pellentesque augue libero, dignissim vel odio sed, fringilla pretium nisl.
Phasellus iaculis tellus id odio suscipit, at cursus leo mattis. Praesent elementum scelerisque lacus, eu porta ex eleifend aliquet. Mauris odio erat, efficitur non dolor at, tincidunt vestibulum lectus.
Inara Wolf, Ramos inc.
Ut augue enim, tempus sit amet quam vel, cursus elementum nulla. Vestibulum ante ipsum primis in faucibus orci luctus et ultrices posuere cubilia Curae. Etiam ac metus ac enim egestas euismod quis sed dolor. Aliquam eget tellus enim. Praesent eu tristique leo, ut ornare purus. Pellentesque augue libero, dignissim vel odio sed, fringilla pretium nisl. Nulla libero massa, rhoncus in sem semper, suscipit gravida ante. Mauris erat massa, imperdiet quis turpis nec, faucibus aliquam metus. Donec ut egestas orci.

Why Keeping Your Joomla! Website Up-to-date Matters
Keeping your Joomla! website up-to-date is crucial for several reasons. Firstly, it ensures that your website is running on the latest version of Joomla! which includes bug fixes, security patches and new features. This makes your website more secure and less prone to hacking attempts, as security vulnerabilities in older versions are often targeted by hackers.


Secondly, keeping your Joomla! website up-to-date ensures compatibility with the latest versions of other software and technologies, such as PHP and MySQL. This means that your website will run smoothly and efficiently, without any compatibility issues.
Thirdly, regular updates help to maintain the performance and speed of your website. New versions of Joomla! often include optimizations and improvements that can help your website load faster and perform better.
Finally, an up-to-date Joomla! website helps to provide a better user experience for your visitors. New features and improvements can enhance the functionality and usability of your website, making it easier for visitors to navigate and find what they are looking for.
In summary, keeping your Joomla! website up-to-date is essential for security, compatibility, performance, and user experience. It is important to regularly check for updates and apply them as soon as possible to ensure the ongoing success of your website.

How to install Joomla 4?
Welcome to our step-by-step guide on how to install Joomla 4. Whether you’re an experienced web developer or a beginner, we will provide you with all the necessary steps and tools to get your website up and running quickly and easily.
What is Joomla 4?
Joomla 4 is a powerful and open-source content management system (CMS) used to create and manage websites. It was released in 2021 as the latest version of Joomla and offers several new features, enhancements, and improvements over its predecessor, Joomla 3.
Joomla 4 provides an intuitive and user-friendly interface that makes it easy for users to manage their website content. With a wide range of customization options, including templates, themes, and plugins, Joomla 4 allows users to create websites that meet their specific needs and requirements.
Key features of Joomla 4 include a responsive design, enhanced security, improved accessibility, and integration with social media and third-party apps.
Joomla 4 is well-suited for a wide range of websites, from simple brochure-style sites to complex corporate websites, and is known for its scalability and performance.
Technical Requirements
| Software | Recommended | Minimum |
| PHP | 8.0 | 7.2.4 |
| Supported Databases | ||
| MySQL | 5.6 + | 5.6 |
| PostgreSQL | 11.0 + | 11.0 |
| Supported Web Servers | ||
| Apache | 2.4 + | 2.4 |
| Nginx | 1.18 + | 1.10 |
| Microsoft IIS | 10 + | 8 |
Download Joomla! 4
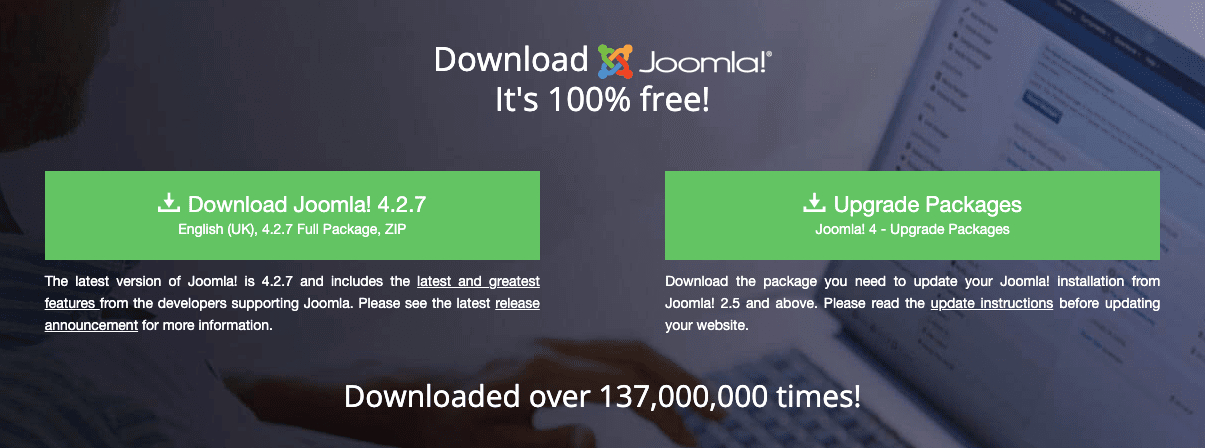
Go to the official Joomla website and click on the “Download” button. From the “Download Joomla!” page, select the latest version of Joomla 4 and click the “Download” button.
Install Joomla! 4 on the server manually
Here is a step-by-step guide to installing Joomla 4 on a server manually:
Upload Joomla! 4 to your server
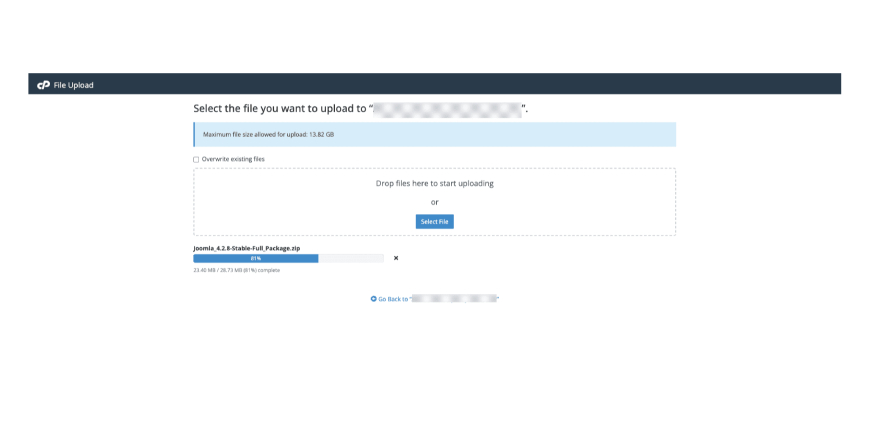
There are two main ways to upload Joomla 4 to your server: via FTP client or through the cPanel file manager. If you’re using an FTP client, you’ll need to download and install an FTP client such as FileZilla and then connect to your server using the FTP details provided by your hosting provider.
If you’re using the cPanel file manager, log in to your cPanel account and navigate to the “File Manager” section.
Create a database
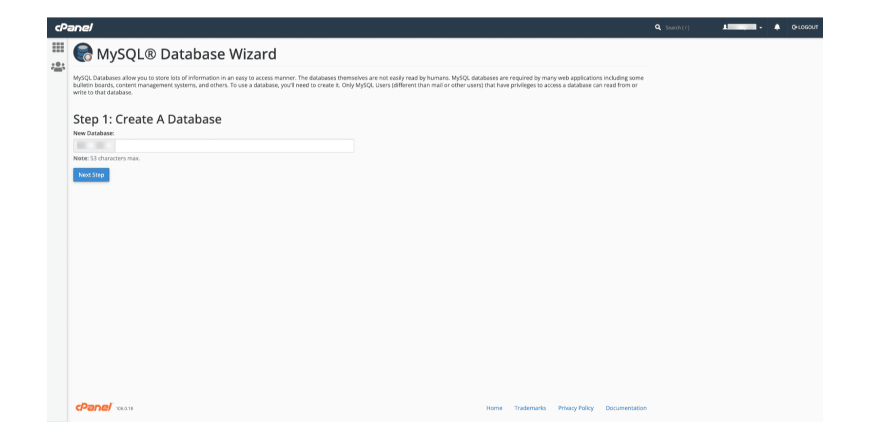
To create a database, you’ll need to log in to your cPanel account and navigate to the “MySQL Databases” section. From there, you can create a new database, a new database user, and assign the user to the database.
Start the installation process
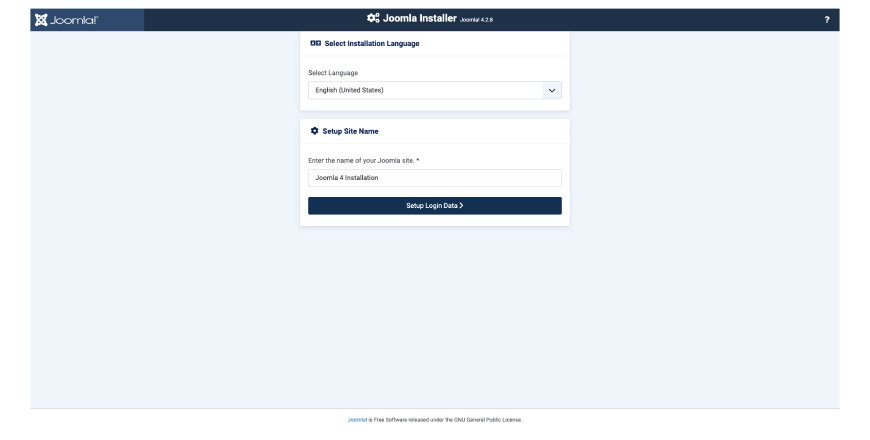
Once you’ve uploaded Joomla 4 to your server and created a database, navigate to the Joomla 4 installation folder using a web browser. You should see the Joomla 4 installation wizard. Follow the instructions provided by the wizard to complete the installation process.
Configure your site
After completing the installation process, you’ll need to configure your site. This includes setting up your site title, admin username, and password, among other things. Follow the instructions provided by the wizard to complete the site configuration process.
Log in to the admin panel
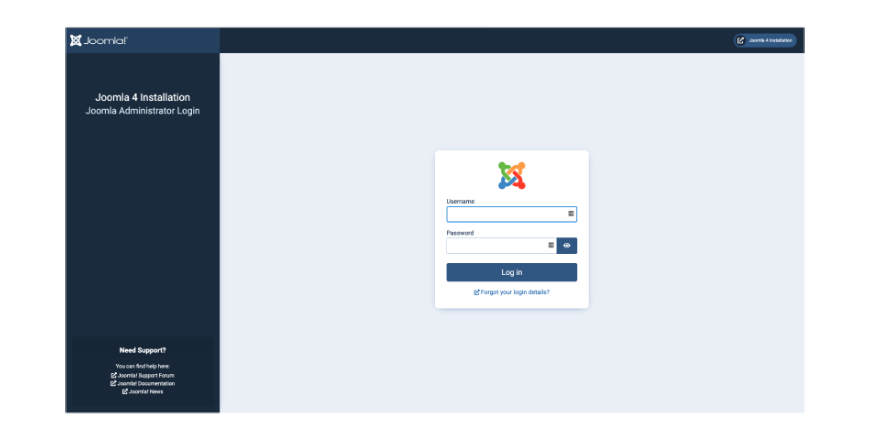
After completing the site configuration process, you’ll be able to log in to the Joomla 4 administrator panel. From there, you can start customizing your site, adding content, and managing your website.
Note: The exact steps may vary based on the specific hosting provider and server environment you’re using. Make sure to consult your hosting provider’s documentation for more information.
Install Joomla! 4 on localhost
Here is a step-by-step guide to installing Joomla 4 on localhost:
Download and install a local server software
To install Joomla 4 on a localhost, you need to set up a local web server environment. You can use popular server environments such as XAMPP, MAMP, WAMP, or any other that you prefer. Start by downloading and installing the software.
Next, place the Joomla 4 installation zip file into the document root folder, which is typically the htdocs folder for XAMPP or MAMP. Unzip the Joomla 4 installation zip file within the htdocs folder. You are now ready to begin the CMS installation process.
Create a database
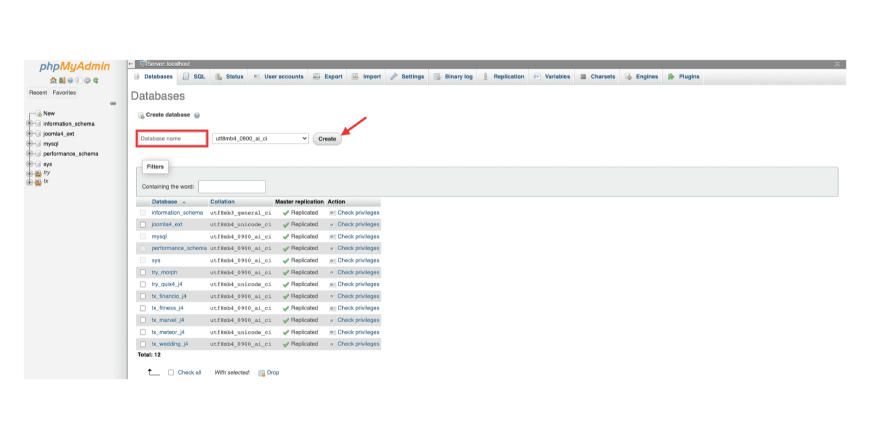
To create a database, you’ll need to use the local server software’s database management tool, such as phpMyAdmin. From there, you can create a new database and set up a new database user.
Start the installation process
Once you’ve extracted the Joomla 4 package and created a database, navigate to the Joomla 4 installation folder using a web browser. You should see the Joomla 4 installation wizard. Follow the instructions provided by the wizard to complete the installation process.
Configure your site
After completing the installation process, you’ll need to configure your site. This includes setting up your site title, admin username, and password, among other things. Follow the instructions provided by the wizard to complete the site configuration process.
Log in to the admin panel
After completing the site configuration process, you’ll be able to log in to the Joomla 4 administrator panel. From there, you can start customizing your site, adding content, and managing your website.
Install Joomla! 4 with App Installer
Here is a step-by-step guide to installing Joomla 4 with App Installer:
Log in to cPanel
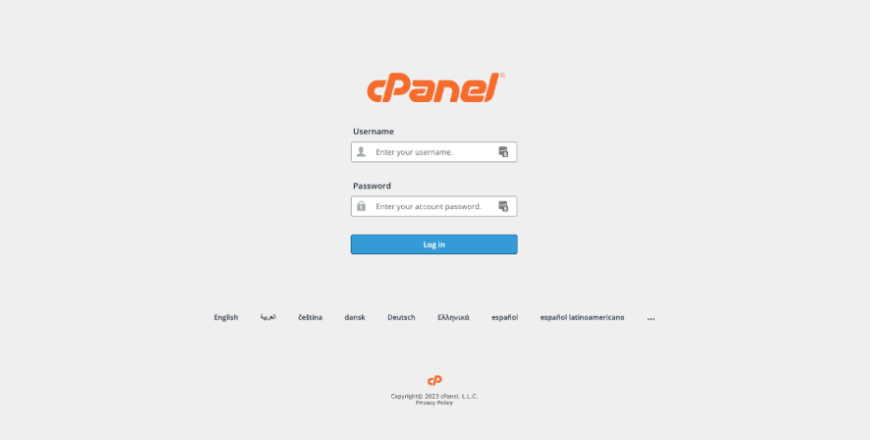
Log in to your cPanel account using the login credentials provided by your web hosting provider. Go to the “Softaculous Apps Installer” section and click on it. Scroll down the list of available applications until you find the Joomla 4 option. Click on it to start the installation process.
Select the domain
Choose the domain you want to install Joomla 4 on. If you only have one domain, it should be pre-selected for you.
Configure the Joomla 4 installation
Fill in the required fields, such as the site name, admin username and password, and email address.
Create a database
If you don’t have a database yet, cPanel will prompt you to create one. Fill in the required fields and click on the “Create Database” button.
Start the installation process
Once you’ve configured the Joomla 4 installation and created a database, click on the “Install” button to start the installation process.
Check the installation results
Once the installation process is complete, cPanel will display the results. If the installation was successful, you’ll see a message indicating that Joomla 4 has been installed successfully.
Log in to the admin panel
After the installation process is complete, you can log in to the Joomla 4 administrator panel using the admin username and password you specified during the installation process.
Note: The exact steps may vary based on the specific version of cPanel and the web hosting provider you’re using. Make sure to consult the web hosting provider’s documentation for more information.
Wrap Up
To wrap up, installing Joomla 4 can be a relatively easy and straightforward process, as long as you follow the steps carefully and have the necessary tools and resources at your disposal.
Whether you are installing Joomla 4 on a localhost or a server, the process requires you to set up a web server environment and then run the Joomla 4 installation script. By following the steps outlined in this guide, you will be able to install Joomla 4 successfully and start building and customizing your website.
Joomla 4 is a powerful and versatile content management system, and with its many features and plugins, you can create a professional and dynamic website that meets your specific needs.
Whether you are a beginner or an experienced web developer, Joomla 4 is an excellent choice for anyone looking to build and manage a successful website.
Set up a multilingual website in Joomla 4
This tutorial will show you how to set up a multilingual website in Joomla 4 using the default Cassiopeia template.
Joomla allows you to easily create a multilingual website without us having to install any third-party extension.
A multilingual Joomla website starts with installing the languages, creating different content elements and ends with publishing the content. Here are detailed steps to create a multilingual website.
Install languages
There are two ways to install languages on a Joomla website. I usually choose to install from the live server.
INSTALL LANGUAGES VIA LIVE SERVER
- To do this, I log into the Joomla admin panel and open the menu
System > Installieren > Sprachen.

- Then I install the language I want by
Installierenclicking the button.

There is no limit to this. It is possible to install all languages that are offered as a Joomla language pack.
INSTALL LANGUAGES MANUALLY
In addition to installation via the live server, manual installation is also possible. To do this, open the Joomla Community Translation Packages [^community.joomla.org/translations.html] website. There is a zip package for each language, which System > Installieren > Erweiterungen > Installationspaket hochladencan be installed via .

Enable content languages
At this point, I think it is important to know the difference between content language and system language. Put simply, the system language is the one that translates the menu items in the backend or descriptive texts in the frontend, such as “Author” or “Created on:” . In contrast, the text of an article is the actual content, i.e. the content. We configure the content languages so that the content of the website is assigned to the correct language and machines also classify a text in the correct language.
- Configuring the content language is done in the menu
System > Verwalten > Sprachen > Inhaltssprachen.

- We select all the languages in which we want to offer content or content. Typically, the content languages matched the languages installed for the system.

Activate the language plugins
In the next step we activate two plugins that are necessary to operate the multilingual website.
The System Language Filter plugin helps you display the content based on the language selection on the website. This plugin must be activated. When it comes to language recognition for new website visitors, the following points are crucial:
- The cookie from a previous visit.
- The “Language selection for new visitors” setting in this plugin.
- If applicable, the language set in the browser.
The System Language Code Plugin helps you to hide the language code in the HTML of the website. It plays an important role in search engine optimization.
Here are the steps to activate these 2 plugins:
- Go to
System > Verwalten > Plugins

- Use search terms in the search bar to find the plugins.
- Activate the two plugins:
System - SprachfilterandSystem - Sprachcode.

Multilingual Content
Once the language plugins are activated, we can start adding new content for each language. As an example, I have added the languages German, Spanish and French to the pre-installed English language on the demo website in this tutorial. The most used content on a Joomla website are articles, categories and modules.
ADD NEW CATEGORIES
In order to better structure the content of the website I create a category for each content language. To create content in different languages, we need to add a new category for each language.
- Go to the menu
Inhalt > Kategorienand create a new category. - In the right pane, select the language for the category from the Language drop-down box.
- Save the category when you have added all content
- Repeat this process for each content language.

ADD NEW ITEMS
Articles are the main content component of the website. Like most content types, they offer the ability to set the language. If Allis selected as the language, the content will be mapped to all content languages.

To create article content in different languages, we add a new article for each language.
- Go to the menu
Inhalt > Artikeland create a new item - In the right pane, select the language for the article from the Language selection box.
- Save the article when you have added all content
- Repeat this process for each content language.
ADD NEW MODULES
We use modules to display content at a specific position on specified subpages of the website. A module can also be assigned to a content language.

On a multilingual website, we can display different modules for each language, depending on which language the content of the module is assigned to. In practice, we’ll use this later in this text to display the navigation appropriate to the content language.
Setting up the menu system for a multilingual website
ADD MENUS FOR EACH LANGUAGE
With a multilingual website, we create separate menus for each language to have better control over navigation. Below are the steps in detail:
- Navigate to
Menü > Manageand create a new menu

- In the right pane, select the language for the menu from the Language drop-down box.
- Save the menu
- Repeat this process for each content language.

CREATE A MODULE FOR EACH MENU
A menu in Joomla is usually displayed via a module. Our goal is that the English menu – and only this – is displayed when English is selected as the content language. The same applies analogously to each additional content language. To achieve our goal, we install a module for each menu, i.e. for each content language. We assign this module to the appropriate language:
- Navigate to
Content | Site Moduleand create a new Modules menu.

- Select the appropriate menu and in the right pane select the language for the module from the Language selection box.

- Save the module
- Repeat this process for each content language.
- We no longer need the main menu, which was automatically created during the installation of Joomla, and for this reason we deactivate it.

- Convince yourself that only the menu that matches the content language is displayed in the frontend at all times.

ADD MENU ITEMS FOR EACH LANGUAGE
Once the menu for each language is created, we add new menu items.
- Open the English menu and click on
Neuen Menüpunkt hinzufügenthe toolbar. - In the right pane, select the language for the menu item from the Language drop-down box. Make sure the correct menu is selected. Set the menu item as the default menu item if you wish.

- Save the menu item
- Repeat this process for each content language.
Multilingual Associations
Multilingual associations are used to redirect articles or menu items of one language to another language when we click on the language switch flag. Website visitors expect to get to the English version of an article when they switch the content language from German to English. However, this is only possible if Joomla knows which articles or menu items belong together. Language shortcuts tell Joomla this information. If we don’t set the language shortcuts, we will be redirected to a language’s default menu item when we change the content language in the frontend. This is not desired and that is why we link the content.
ASSOCIATIONS
If we add a menu item and assign a language to it, the options for associations will appear. We find these in the tab Assoziationen. The menu items of other content languages can be selected.

Assoziationencan also be found in other Joomla elements. For example with articles.
THE MULTILINGUAL ASSOCIATIONS – LANGUAGE ASSOCIATIONS COMPONENT
The component Mehrsprachige Assoziationenor Sprachverknüpfungenis a tool that makes it possible to edit associated elements side by side without having to switch back and forth. It is very convenient to create an element in several languages and to associate it at the same time. The side-by-side view allows us to edit the elements after selecting a reference element.

To get to this component, we navigate to Komponenten > Mehrsprachige Zuordnungen / Sprachverknüpfungen.

Set default page for each language
The default page is the home page for each language. Set a default menu item in each menu. For example, if you click the Home menu item as default in the English main menu, that becomes the default menu item for English-language sites.

- Open the English main menu and let’s click on the circle icon to set the menu item as the default for that language.
- Repeat this process for each content language
Language switcher module
This language switching module displays a list of available content languages. This way you can switch back and forth between them. The prerequisite is that Joomla is used as a multilingual website and the content languages have been defined and published as explained above.
- To set up the language switcher navigate to
Content | Site Moduleand create a new Language Switcher Module.

- I assign the module to the languageswitcherload position.

- Once the module is published, we can use it in the frontend.

Complete!
Expertise you can count in Joomla
It’s great to hear that your team has extensive experience with Joomla development and that you offer consultancy and training services for clients who are new to the platform. Providing guidance on how to best improve a client’s existing Joomla website and advising on which extensions to use to streamline the site’s performance are also valuable services that can help clients optimize their online presence.
As a powerful and flexible CMS platform, Joomla can be customized and optimized in many different ways, and it’s important to have a team of experienced developers and designers who can help clients make the most of its features and capabilities. By providing genuine insight and expertise, as well as ongoing support and training, your team can help clients achieve their goals and succeed in the digital landscape.

Joomla 3.x to 4.x Step by Step Migration
Migrating from Joomla 3.x to 4.x can seem like a daunting task, but with proper planning and execution, it can be done smoothly. Here is a step-by-step guide to help you through the process:
- Take a backup of your current Joomla 3.x site, including both the files and database.
- Check if your current Joomla extensions and templates are compatible with Joomla 4.x. If not, look for updates or alternatives that are compatible with the new version.
- Disable any non-core extensions before starting the migration process.
- Download the latest version of Joomla 4.x and install it in a subdirectory or subdomain of your website.
- Use a migration tool like SP Upgrade or J2XML to transfer your Joomla 3.x site to the new Joomla 4.x installation. This can be done through the backend of your Joomla 4.x site.
- Once the migration is complete, re-enable your extensions and templates one-by-one, making sure they are all functioning correctly.
- Check and update any custom code or extensions that may not be compatible with Joomla 4.x.
- Test your website thoroughly to ensure all functionality is working correctly.
- If everything is working as expected, move your Joomla 4.x site to the root directory of your website and delete the old Joomla 3.x files.
- Finally, make sure to update your Joomla installation regularly to keep it secure and up-to-date.
Remember, it is always recommended to perform a migration on a test site before doing it on a live site. Also, seeking the assistance of a Joomla expert can help ensure a smooth and successful migration.
There have been numerous versions of Joomla since its launch in 2005. Joomla 3 was introduced for the first time in 2013 and Joomla 4 was released in 2021. Joomla 4.1 was released in February 2022 and Joomla 4.2 will come out in August 2022. So, if you want to access all the advanced features of Joomla, it’s high time you do Joomla 3 to 4 migration.
Some of the improvements in Joomla 4 are:
- The bootstrap has been updated in Joomla 4 for better performance and user interface. Joomla 3 used bootstrap 2 whereas Joomla 4 uses bootstrap 4. Simultaneously, there has also been an upgrade from LESS to SASS in Joomla 4.
- Although Joomla 3 has two default front-end templates and Joomla 4 only has one default front-end template, it is much more developed and advanced. The Joomla 4 front-end template is called Cassiopeia.
- Joomla 4 has a much simpler installation process as compared to Joomla 3. Although Joomla 4 has the same 3 step installation process as Joomla 3 now users can look back on previous data and save it without stalling the installation process.
The following instruction is the basic step-by-step procedure to migrate your 3.10.x site to Joomla! 4.x
Create a Backup for your Website
Before you begin the Joomla 3 to 4 migration process, the most important step is to create a back of your website. In case anything goes wrong during the migration process or you face an unwanted technical difficulty, you should be able to restore the backup site.
The backup website will have the entire database and documents of your original website. You would not want to lose even a single document during the migration process.
Now there are multiple ways you can create a backup for your website:
- A traditional way to create a backup of your website is by using the software. There is numerous free software available online but you must know which is the best choice for you and why. This method requires some technical knowledge and might be difficult for a beginner.
Usually, the software you are using would require you to enter your credential to access your website’s control panel. Once it has access you can start the backup process. The process might vary for each software. - A lot of web hosting plans come with a cPanel. If you do not want to use a software or plug-in, you can use cPanel to create manual backups. However, keep in mind it will be a lengthy process and each step would require precision.
- If you are using WordPress you can create a backup simply by using plug-ins. WordPress provides numerous plug-ins and extensions to create a backup of your site. You can also schedule the backup and the extension will take care of everything. Some of the reliable and efficient plug-ins are Total Upkeep, XCloner, Backup & Staging, etc.
- This step is the easiest and would require you to do nothing. Hire a third-party service and it will handle the backup process for you.
➡️ Lastly, after successfully creating the backup, set up a staging site. It is a clone of your live website and will allow you to check whether the backup has been done properly or not. It will allow the opportunity to catch errors, fix them, and then move ahead with the migration process.
Check the Technical Requirements
After creating the backup of your website, move ahead and check the technical requirements for migrating to Joomla 4. To check the technical requirements, go to the admin panel > System > System Information. Ensure you meet all the requirements to have a smooth Joomla 3 to 4 migration.
Some of the basic technical requirements are –
| Minimum Required | Recommended | |
| Software – PHP | 7.2.5 | 8.0 |
| Supported Database – MySQL | 5.6 | 5.6+ |
| Supported Database – PostgreSQL | 11.0 | 11.0+ |
| Supported Web Server – Apache | 2.4 | 2.4+ |
| Supported Web Server – Nginx | 1.10 | 1.18+ |
| Supported Web Server – Microsoft IIS | 8 | 10+ |
Assess the Extensions
You might be using extensions with Joomla to increase the functionality of your website. Hence, while migrating you will also be required to assess each extension and determine how to manage its migration. To manage the extensions, before upgrading open components > Joomla Update and Extensions > Manage.
Here you will have to one by one assess each extension working on your website. Joomla 4 has a lot of new updates, hence, there is a probability you won’t be needing some extensions. If they are not needed, you can simply uninstall them.
To uninstall them,
Go to extension manager > managerClick on the search tool button to view the filter optionsFrom the drop-down menu select ‘package’Simply uninstall extensions packages no longer needed
For the extensions you want to keep, you will again need to check if they have to be updated as well. Doing this is pretty easy. Follow the steps mentioned below.
Go to extension manager > update tabClick on find updatesUpdate all the extensionsCheck if the extension has a one-click update i.e., for both 3.10 and 4. If yes,
chose that, and if not then you will have to look at each package (3.10 and 4) separately.
If there are some extensions that are not compatible, you will have to disable them or assess them manually. To resolve these issues check the type of package and migration path of each extension to determine how it can be upgraded or migrated.
Do a Pre-update Check for Joomla 4
Keeping the migration from Joomla 3 to Joomla 4 in mind, Joomla 3.10 has a built-in option for the pre-update check. It is highly recommended to do a pre-update check before going through the migration process. This will allow you to check whether all the elements of your website are compatible with the new version or not.
To do this, follow the steps mentioned below:
Go to components > Joomla updates > Check for updates > Pre-update checkRead the pre-update checklist carefully. It will have all the information
regarding your technical readiness and whether you have passed the technical
requirements or not.Checking the pre-update list is another way you can find which extensions will
work with Joomla 4 and which won’t. For the ones which won’t work,you can assess
them manually by following the steps mentioned above.
Update Joomla 3 to Joomla 4
Now finally it’s time to migrate from Joomla 3 to Joomla 4 by updating and installing Joomla 4.
To do the same, continue with these steps:
Click on System > Global Configuration > Server Tab > Error Report > MaximumClick on Save and closeFor confirmation of the installation, you will have to log in using your credentials.Once you are logged in, click ‘install’View the dashboard of Joomla 4
Your migration from Joomla 3 to 4 is complete now and you will now be able to see the installed Joomla 4. In case there are some errors due to incompatibility of some elements, Joomla will showcase a warning. You can review the conflicts and resolve them accordingly.
Post-Update Operation
Now that you have successfully migrated from Joomla 3 to Joomla 4 and have installed Joomla 4, there are post update activities you should keep in mind and complete. You do not have to necessarily do them immediately after the installation of Joomla 4 but do not delay them for long either.
- Clear cache
You will have to clear the cache that must have been saved during the update and installation process. Do not worry, you will not have to do it manually because Joomla 4 has a built-in system for managing and clearing cache. To clear the cache you will have to log in to the Joomla administration Dashboard as an admin or other designated user.
In the top right corner of the dashboard, open the system and then click on the cache. From here you can manage and delete your cache. Alternatively, you can also click on ‘system’ from the main menu on the left. Open maintenance and then click on ‘clear cache.’
Cache files have an expiration date. If they are not automatically deleted, you can select the ‘clear expired cache’ button at the top of the page. Through this action, all the expired cache will be deleted however, cache files that are not expired will not be deleted.
- Check the database schema and fix if any errors show
Sometimes after Joomla’s latest version is downloaded, the database schema automatically changes. Hence, it is recommended to check the database schema and fix it in cases of errors.
It is a simple process and can be done with a few clicks. Go to the database fix page and click on extensions > manage > database. After that simply click the small fix button underneath the big box.
- See if your site is performing as expected ( both frontend and backend )
After passing the long process of migration you will naturally expect your site to perform well both at the frontend and backend. To check if your site is performing as expected you can run some simple tests using some external tools and software.
For instance, google page speed is one tool you can use to check the performance of your website. It will not only check the site and its performance but also generate an explanatory report for the parameters not working well if any.
- Set the error report from maximum to default
Joomla offers five levels to report an error, namely, system default, none, simple, maximum, and development. When the error report is set to default, it leaves the level of PHP reporting to that set up in the server.
Whereas when the error report is set to maximum it overrides the server to fulfill its role of reporting all errors. Hence, it is recommended to keep the setting at default to avoid overriding issues.
To set the error report, go to the admin page and click on the server tab. Once there, locate the error reporting and click the desired setting option. Click save and close.
- Install Joomla 4 ready extensions as needed
Once Joomla 4 is successfully installed, you can also restore and install your extensions. In case there are still some extensions you don’t need and forgot disabling them, you can disable them now. Whereas the extensions you need and selected earlier will automatically have been upgraded to be compatible with Joomla 4.
Site Restore and Go live with Joomla 4
Now that all the steps and post update checks are done, you can go live.
Move all the data from the backup site to Joomla 4 and go live.
Welcome to Joomla 4.
Additional Steps to Keep in Mind
- Make sure you are using the Joomla 3.10 version before you decide to migrate to Joomla 4.
- Assess the goals and objectives of your website while doing the migrating process. This is the time you can replan your goals and modify the website accordingly.
- Think twice before keeping and deleting extensions during the migration process.
- Read articles and guides online if you are confused at any step during the migration process.

Focus Energy and Resources in joomla
Focusing energy and resources in Joomla refers to optimizing the use of Joomla’s features and tools to achieve business goals efficiently and effectively. Joomla is a powerful content management system that can help businesses and organizations to manage their online presence and achieve their objectives, including generating leads, driving traffic, improving user engagement, and increasing sales.

To focus energy and resources in Joomla, businesses and organizations can take the following steps:
- Define business objectives: Before using Joomla, it is essential to define specific business objectives and goals that the website or online presence should achieve. This could include increasing traffic, generating leads, improving user engagement, or increasing sales.
- Develop a content strategy: A well-defined content strategy is crucial to focusing energy and resources in Joomla. This involves creating a plan for creating, publishing, and promoting high-quality content that resonates with the target audience and supports the business objectives.
- Use Joomla’s built-in features: Joomla provides a wide range of built-in features and tools that can help businesses and organizations to optimize their online presence. This includes tools for managing content, users, and access, as well as extensions and plugins for adding functionality and features to the website.
- Customization and extension development: Customization and extension development in Joomla can help businesses and organizations to achieve their objectives by building specific features or functionality that may not be available through Joomla’s built-in features or extensions. This requires working with an experienced Joomla developer to build a custom solution that meets the business needs.
Overall, focusing energy and resources in Joomla requires defining business objectives, developing a content strategy, using Joomla’s built-in features, and customizing or extending the platform as needed to achieve specific goals. With the right approach and expertise, Joomla can be a powerful tool for businesses and organizations looking to optimize their online presence and drive success.

Developing Critical Elements in Joomla
Developing critical elements in Joomla refers to building the essential features and functionalities required to achieve business objectives and improve the website’s overall performance. Critical elements in Joomla could include user management, access control, security, search engine optimization, content management, and other functionalities that are specific to the business’s needs.
To develop critical elements in Joomla, businesses and organizations should follow these steps:
- Identify the critical elements: The first step is to identify the essential features and functionalities required for the website. This involves assessing the business objectives, target audience, and the website’s current performance.
- Use Joomla’s built-in features: Joomla provides a wide range of built-in features and tools that can help businesses and organizations to develop critical elements. This includes tools for user management, access control, security, search engine optimization, and content management.
- Customize and extend Joomla: In some cases, businesses and organizations may need to customize or extend Joomla to develop critical elements that are specific to their needs. This requires working with an experienced Joomla developer to build a custom solution that meets the business requirements.
- Test and refine: Once the critical elements have been developed, it is important to test and refine them to ensure that they are working correctly and effectively. This involves testing the functionalities and features and making necessary adjustments to optimize their performance.
Overall, developing critical elements in Joomla requires identifying the essential features and functionalities required for the website, using Joomla’s built-in features, customizing and extending Joomla as needed, and testing and refining the critical elements to optimize their performance. With the right approach and expertise, businesses and organizations can leverage Joomla’s powerful capabilities to develop critical elements and achieve their objectives.

Ready for all of your Joomla support needs
Our support packages are tailored to meet your exact requirements and include a selection of our other services, such as security patching and search engine optimisation.
As we’ve been using Joomla for so many years, we can provide a dedicated hosting environment more tailored to your website – and can recommend the right security functionality for advanced protection.
We provide the broadest possible range of support services, assisting our customers with:
- Website builds
- Hosting and security
- Upgrades and extension development
- Template installations and customisation
- Formatting and layout
- Sitemap generation
- Implementing traffic monitoring tools
- Joomla training